Showing posts with label Imagine. Show all posts

Friday, June 29, 2012

Using Imagine Art cartridges in the Cricut Expression

Last week I received an email from a lovely lady called Suzanne. Suzanne has a Cricut Expression and recently purchased an Imagine Art cartridge not realising that she couldn't use it in her machine.

Before she put it up for sale on eBay she emailed me to ask if there was any way she could use that cartridge.

My immediate thought was that as there's no Imagine slot in the the Expression, the answer would be no. But then I thought about it a bit more and realised there is a way.... by using Cricut Craft Room!!

First, you will need a friend who will let you link the Imagine cartridge to your cricut.com account using their Imagine or Expression2. (Make sure you're logged into your account, not there's!!)

Once you've accomplished that all you need to do is connect your Expression to your computer, create your design using the linked Imagine cartridge and send it off to cut!

This should also work with the Cricut Personal, Create and Mini. (I haven't tried them but I see no reason why it won't work.)

Don't have a friend with an Imagine or E2? All is not lost. This will also work with the Digital Imagine cartridges that you can purchase from Cricut.com.

Surely it can't be that easy???? Well... there are a couple of things to keep in mind.
  • As the Expression doesn't have any printing capabilities you will only be able to cut the images from the cart. For the same reason you can't use the Imsgine Colors and Patterns carts.
  • You will need to edit the images before you cut them as they are made up of multiple layers. For example this image from the Best Friends cartridge looks like this in CCR when the Imagine is selected as the default machine:

And like this if the Expression is chosen:


If you were to cut the image as it appears above this is what you'll get:


A jumbled mess of useless body parts! That's because every single line in the image is cut. To get a useful cut of the image here's what you need to do.

Select the image on the mat and click the Edit Group button


The Combine/Separate buttons will appear in the right corner of the screen. Click the Separate button.

Now your image will look like this:


Click the Exit button (or press Esc) to go back to the mat screen.

Now when you cut your project, each of the five layers will cut separately. At the moment they are automatically grouped. To move the individual pieces around on the mat click the Ungroup button on the toolbar. You can then space each piece out on the mat allowing you to load your mat with different colours of cardstock.

Remember, if you want to resize the image once you've ungrouped it, you will need to select all the pieces by using Ctrl A (Cmd A) or select Edit, Select All. Then use the resize handle to increase or decrease the size of all the pieces at the same time.

As you can see from the image above, you will lose the facial features of the image as those parts are only printed. Time to break out those Peachy Keen stamps you've got stashed in your drawer!

Play around with the different Imagine cartridges in CCR before you start purchasing them. Some images will work better than others.

Here's another example:

An image from the JT Imagine cart as it would print:


That image when the layers have been separated (still with the Imagine selected as the default machine):


And how it looks when the Expression is selected as the default machine:


So if you're one of those cartridge collectors that has accidentally purchased an Imagine Art cartridge, all is not lost! Have fun experimenting. 



Saturday, June 9, 2012

More on CCR and the Imagine cutting problems

On Friday I posted instructions on how to get the previous version of CCR onto your computer. One of my readers, (Colleen) just let me know that Cricut.com have posted a link to the old version (Build 132 and 133 for the Mac). Here are the links:

PC Version:  http://craftroom.cricut.com/betaprogram/cricut-craftroom_132.exe
Mac Version: http://craftroom.cricut.com/betaprogram/cricut-craftroom_133.dmg

So if you don't want to keep 151 on your computer you can just do that update and 151 will be removed.


If you want to have both builds on your computer follow my instructions.

This is great news for those with a Mac as I wasn't sure how to get that problem fixed. (Hey, I've bought cartridges to help people with their problems. I even bought an Imagine so I could help. But I draw the line at a new computer!!! At least while mine is working fine....)  (Never say never, right!)


Thanks for letting me know Colleen!


Friday, June 8, 2012

Using an old build of CCR

For those of you who have an Imagine you will no doubt know by now that Build 151 has most likely caused your Imagine to stop cutting. Until PC fix that problem all is not lost.

It is possible to use a previous version of CCR.

When you installed the new version you most likely installed it over the previous version. All you need to do is have the previous Craft Room files on your computer to allow you to run that version.

Here's what you need to do:
  • Create a directory on your computer and call it Cricut Craft Room Build 132
  • Go to this link and download all 13 files and save them into the directory you just created
  • Once you have downloaded those files go to this directory on your computer: C:/Program Files/Cricut Craft Room. You will see 4 sub-folders there called assets, Drivers, icons and META-INF. Copy those four folders (and all their contents) to your Cricut Craft Room Build 132 directory. (Highlight all four folders and press Ctrl C. Then navigate to your Build 132 directory and press Ctrl V. You now have the full set of files required to run CCR Build 132. Next you'll create a shortcut for your desktop to open that version
  • While you're at the Cricut Craft Room Build 132 directory highlight the Cricut-Craft Room.exe file (its type will be Application and its size should be 139KB) and press Ctrl C.
  • Right click on your desktop and select Paste Shortcut. (Don't just select Paste as you'll get an error when you try to open it. You need to select Paste Shortcut.
  • Right click the new icon on your desktop and select Rename. Add Build 132 to the end of the shortcut name.
  • Now you can use that shortcut to open Build 132. Use that icon whenever you want to use the old build. 
For those times that you do want to use the new build (when you're not using your Imagine and you want to use the new features) just open CCR from the usual icon on your Desktop. I use the new version to create my files then close CCR and open it up in the old version so I can cut the file on my Imagine.

Hope that helps!


Sunday, August 21, 2011

Build 59 causing Imagine layering problems

If you're having trouble getting the layering method to work it's not something you're doing wrong. The problem started when Build 59 was released last week. Currently all the layers are cutting separately again. Insert unhappy face here!

I'm still trying to figure out if there's still a way to print and cut all the layers as one and will post if and when I do!


Monday, August 8, 2011

More on Printing and Cutting layers with the Imagine

In this post I showed you how to group together all the layers from an image so you can print and cut the entire object.

http://cricutcraftroomblog.blogspot.com/2011/07/printing-and-cutting-disney-layers-on.html

Today I want to show you how to take that one step further, using the Hide Contour feature.

Many of the layers on the carts are made up of more than one shape. For example the Pluto image on the Mickey Font cart has a collar that doesn't align correctly because it is made up of 3 separate parts. The part on the left doesn't align properly with the other layers of the object.


This is how it looks not aligned properly beside how it should look:


Now, let me show you how to achieve that using a second copy of the collar and the Hide Contour feature.

Place all the parts of Pluto except for the collar on the mat and align them correctly on top of each other.

Don't forget to select Don't Weld on each of the layers. I just picked any old colour from the colour palette for this example.

Place two copies of the collar on the mat. You can colour them now or later when you place the object on top of the other layers. I've coloured them here so it's easier to see.

Note: Don't use Copy and Paste to create your second copy of the object. Pasted objects don't work well with the Hide Contour feature. Quite often the whole object will be hidden instead of just the contour you are clicking on. 

We only need two copies of the collar because it is only the left hand part that doesn't align. The two right hand parts are in their correct positions and don't need to be separated.


Select the first collar and click the Hide Contour button


Hover your mouse over the left hand piece of the image and click to hide it.

Press the Exit button to return to the main screen.

Your image will look like this:


Select the 2nd copy of the collar and click the Hide Contour button


This time hide the two right hand side pieces

Select Exit to return to the mat.

That piece will now look like this:

To two pieces together will look like this:


Select the larger piece and move it over and align it


Select the other piece and move it over and align it.

And you're done!


So, that was an easy one to do because we only needed to hide two parts of a layer.

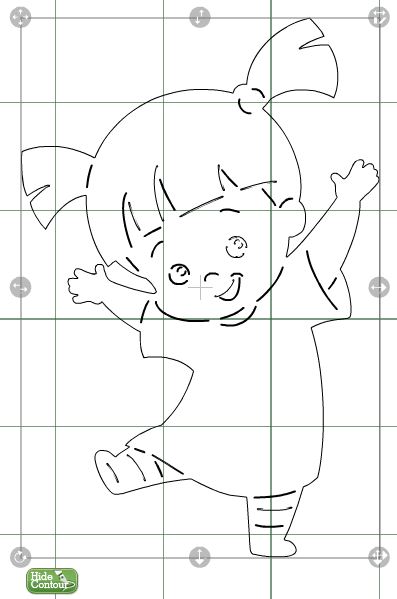
You'll find that many of the images on the carts will have layers that are made up of numerous parts. For example Boo(1) from the Best of Pixar cart has five parts to her face, arms and legs, three parts to her hair, five parts to her boots, smile and eyes and two parts to her pants. That's a lot of layers to duplicate and contours to hide!


And because there's no Blackout feature on this cart and I didn't want to use the Shadow for the background I hid all the inside contours of the Base image too. (Zoom is your best friend when doing this).


And here she is put together.


Here's another one. This is Dash from the Best of Pixar and it was a marathon effort.


Please ignore his pink eyes. I forgot to change them back to white before I printed him!


Saturday, July 30, 2011

Printing and cutting Disney layers on the Imagine


Please note that since Build 59 of CCR was released the process covered below is not working and Build 60 didn't address the problem. The design will print but all the layers cut instead of just the outline.

8 Dec 2011
PC has stated that the reason that this was working in the first place is because of a bug. Whether they'll add this as a feature at some point is unknown.


You can still follow the instructions below and let it print. Then as soon as the outline of the image has cut press the Cancel button. That way the layers won't cut.


You can download a PDF version of this tutorial from here: http://www.box.net/shared/9lxzj7okc7tmcmgjj4uv


One of the things that many users of the Imagine have been wanting to do is weld together all the layers of an image from the Disney cartridges (amongst others) so that it will print as one object and then cut the entire image.

Well, using CCR I finally cracked it!

I found that the main trick to getting it to work is to not weld the images and to not group the top layers with the base layer. I even managed to hide the contours within the base layer and it still worked!

(I tested this at least 10 times to make sure it wasn't a fluke...)

Confused?? Here's what you do.

I'm using Daisy from the Mickey Font cart if you want to play along. (I don't have the Mickey & Friends cart but will show you some examples from the Best of Pixar cart at the end.)

Daisy is on page 131 of the handbook. This shows you which layers I'll be using. Please note you won't be using the base layer of the image. You'll be using the blackout feature instead.

On carts that don't have a blackout feature you'll use the Shadow feature. On carts that don't have a shadow feature you would use the base layer on which you would use the Hide Contour feature to hide all but the outside contour. 


  • Select the Imagine as your Default machine from the Options menu, Project tab
  • Set the size of your base image in the Options menu, CraftRoom tab, Dial Size
  • Ensure that Relative size is showing on the toolbar
Turn Mat Layers off if the message asking "Do you want to add this design to a new layer or the current selected layer" annoys you. You'll find that in Options, CraftRoom, Mat Layers Enabled. If you leave Mat Layers turned on always select Current Layer when that message pops up.
  • Place all the required layers of the design on the mat by selecting each required feature key in turn. 
Make sure you place the blackout layer on the mat first. By doing this you won't have to use the back/front toolbar buttons to move the layers in front of the blackout (base) layer.


  • So that you can see more of the mat (without zooming out) you can now close the Drawer by clicking on the green arrow.


  • Select the Colors and Patterns menu, then select Colors from the drop down box. 


It doesn't matter which Imagine cartridge is showing in the Color Palette. Any cart will do.


  • Click the blackout layer on your mat then select Black from the Color Palette. That layer will now turn black.

  • Click on your next layer and select any other color from the Color Palette. (We'll change it to the exact RGB color later). I selected yellow from the main palette. You can use the image in the cartridge handbook as a general guide.

  • Drag the selected layer on top of the blackout layer and position it so it aligns correctly.

When you release the mouse the selected object will turn grey.


You'll notice at the top of the object the Weld/Don't Weld box will appear.


  • Click on Don't Weld
The layer will turn black.


Now we'll change that layer using its correct RGB code. (You don't have to use the correct RGB color if you don't want to. You can just select any color from the Color Palette).

The RGB code for Daisy's mouth is R255, G156, B0
  • Making sure the mouth layer is still selected click on the down arrow beneath the Color Palette and type those numbers into the correct boxes. 
  
  • Click the Apply button


  • Select the blackout image and click Don't Weld

  • Select the next layer (Daisy's bow/ears) and change its RGB code to R255, G156, B206

  • Drag it on top of the base layer and align

  • Click the Don't Weld button

  • Color and place the two remaining layers remembering to click Don't Weld on each of them.
The RBG code for the face is 255, 255, 255 which is white - so you can simply select that color from the regular color palette

The RBG code for the tongue is 255, 148, 148

When you've placed those two layers your image should look like this:


There's just one final thing to do before you're ready to print and cut.
  • Drag a selection box around the whole image (or select Ctrl A / Cmd A or select Edit, Select All)


All 5 layers of the image will be selected. Now you need to de-select the base layer.
  • Hold down the Ctrl key and click somewhere on the black part of the image. (In this case the eyes are the easiest). The base image will now be deselected. You should notice that the selection box became a tiny bit smaller.

  • Click the Group button on the toolbar


Now everything apart from the base layer will be grouped. To test that it worked click anywhere on the top layer and you should be able to move it all away from the base layer. (This isn't a necessary step. It's just so you can check that it worked)


  • Move the top layer back and align it on top of the base layer


And now you're ready to print and cut!
  • Click the Go button

  • At the Print and Cut dialogue box click on the arrow beside the Layer drop down box and select "daisy"

  • Click the Go button. CCR will check your Imagine to verify that the correct cartridge has been inserted

Once it has detected the cartridge it will send the project to the Imagine


You'll then see this message.


  • Insert your mat into the machine. While pressing the mat in click the Go button on the Imagine screen.
Your project will print, then after a pause of about 15 - 30 seconds it will proceed to cut.

And here it is:


And here's some I prepared earlier!


It's obvious I still have some adjusting to do to get my calibration just right, but I'm very happy with the result!

Once you've done a few of these it takes about 5 minutes start to finish.

If you have any questions please let me know!