Showing posts with label Layers. Show all posts

Monday, February 11, 2013

Layering in CCR

Layering is a breeze in CCR. You just need to follow a few simple steps....

The most important thing to remember is that you must have Relative size selected. Otherwise each layer will be exactly the size that you have set as the Default Height. Using Relative size means that each of t-he layers of the image will be cut in proportion to the main image. (In this case the main image is the one on the Basic tab.)

You will find the Relative size button below the CCR keypad. If the button is green, it is active.


You also need to remember not to resize individual layers. You should select all the layers on your mat and resize them at the same time. More on that later!

Here's an example using the Raccoon from Create A Critter.

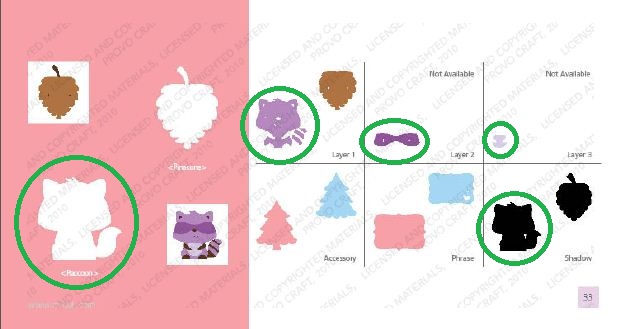
The picture below shows you the page from the handbook that has the raccoon on it.

In this cartridge each of the layers is on its own tab.

Some cartridges though will have some of the layers on the <Shift>  of the image keys.

I have circled the images that I will be using. Note that each layer is on the <Non Shift> keys.
I'll be using the Base (Basic) layer, Layer 1, Layer 2 and Layer 3. I'll also use the Shadow layer. And because I have no idea what colour a Raccoon is supposed to be I'll use the colours that are in the handbook!  There's no Raccoons where I come from!!! :)

Now let's take a look at the CCR keypad for Create A Critter with the Raccoon circled.
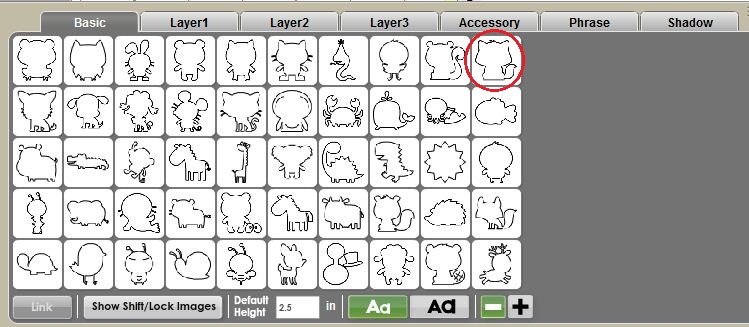
You'll see the layer tabs above the image keys.


Don't forget you can zoom the keypad icons in and out by clicking on the - and + icons below the keypad. This makes it much easier to find the shape you are looking for. You should also see the name of the shape appear as you hover over the keys.


I want my finished shaped to be 2.5" in height. So I set that size in the Default Height box below the keypad.


Now I'll start adding the layers to my mat. Here is where you have a couple of options. You can place all the different layers on one mat (spreading them out over the mat so you can position the different colours of cardstock needed) and cut everything at the same time.

Or you can create a new mat for each layer and send each layer to the Cricut one at a time. For this example I'm going to use a different mat for each layer.

I'm going to add the Shadow layer to the mat first because that will be the bottom layer. Each time you add a new mat it will automatically be added on top of the previous mat. (That is until you start moving your mats around.... then things get a bit messier.)
  • Click on the Shadow tab, then click on the Raccoon key. 

Because this is a new file the shape will automatically be placed in the top left corner of the mat. (No need to drag it there...)


I'm going to change the preview colour of this layer to black.

Remember... changing the Preview colour is different to using the Auto-fill feature. The preview colours don't print and are merely here as an aid to see what your finished project will look like. It's a great feature because you can play with different colours on the screen instead of wasting your precious card stock!
  • Click on the red dot on the layer tab.

  • Drag the arrow on the slider down to the bottom to change the colour to black. (That's the quickest way to get black.) 
Or you can type 0, 0, 0 in the RGB boxes
  • Press the Apply button and the preview will now appear in black


  • To add a new mat for the next layer click on the + button next to the Layer 1 tab.

The active layer will have a light grey coloured tab. In the picture below that is Layer 2. Notice how the tab for Layer 1 is now a darker grey meaning that it's not the active mat.


  •  To add the next layer to our project click on the Basic tab. 
  • Then click on the the Raccoon key.


The image is added to the active mat beside the shadow layer.


Next I'll change the colour of that layer. Going by the colour in the handbook I'll change it to a dark brown colour.

  • Click on the Yellow dot on the Layer 2 tab. 
  • Click somewhere in the yellow/orange zone on the colour wheel then drag the slider down to select a darker shade.


You can move around in the colour wheel to select different shades of a colour. You can also move the slider up and down to change from light to dark tones of that colour.

  • Select the shade you like then press the Apply button. (If you want to use that colour again later write down the RGB codes from the boxes below the colour wheel.)


Next we'll add the image from the Layer 1 tab.  

(This can get confusing when our mat layers are called Layer 1, Layer 2 etc and so are the tabs on the cartridge keypad....!! You can rename your mat layers if that helps by double clicking on the the mat layer name and overtyping it with a new name.)
  • Add another mat to your project

  • Click on the Layer 1 tab on the keypad then click on the Raccoon to add it to the active mat.


I'll change the colour of this mat to a medium purple shade.
  • Click in the purple area of the colour wheel and use the slider to select a medium shade.


  • Click Apply


Using the same method as above I'll add the two remaining layers each on their own mat.

The Layer 2 image is a dark purple and the Layer 3 image is a pale purple.

Once that's done your screen should look something like this:


You can move the shapes on each mat on top of each to see what the final image will look like when it's cut out and put together.

Click on the brown layer and slide it over the black layer and align it. Repeat for the other layers until you get something like this:


When you're ready to cut the project you can either move the shapes to different areas of the mat and cut each layer in turn. Or you can copy and paste everything to one layer, load up your mat with each of the colours and cut it all at once.

If you decide you want to resize your images make sure you select all the layers first. To do that select Ctrl A (Cmd A for the Mac) or select Edit, Select All. Then use the bottom right handle on the images to resize all the layers together. That way they'll all stay in proportion.

(If you have pressed the eye button (hide/show mat) on any of the mats, the image/s on that mat won't be selected. Press the eye button again to view those mats again. Then Select All.)

I hope that helps you with your layering!!



Wednesday, January 16, 2013

Copying objects to a new layer (updated)

Do you want to copy or move images from one mat layer and place them on a different mat layer? Well here's how you do it.

Download a PDF of  this tutorial from here: https://www.box.com/s/z77t7d08meyhsiu77m24

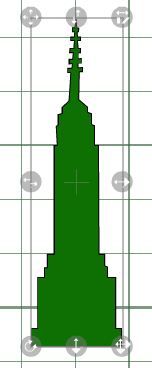
  • Place your image on the mat


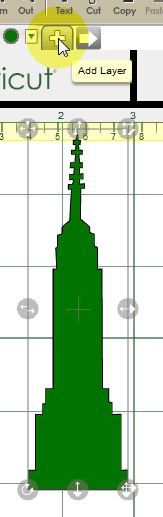
  • Click the + button next to the Layer 1 tab.

A new layer (Layer2) will be added to your project.


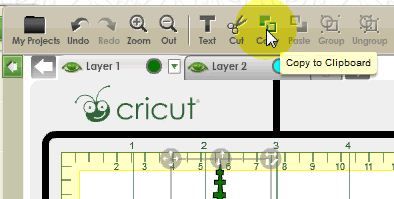
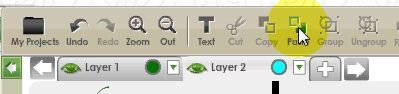
  • Click on your first image to make sure it's selected then press the Copy button on the toolbar

The image will be copied to the clipboard.

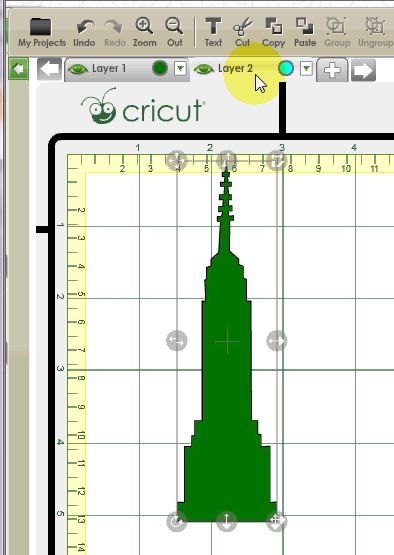
  • Click on the tab for Layer2 to make it active. (It will turn light grey.)
  • From the toolbar click the Paste button 

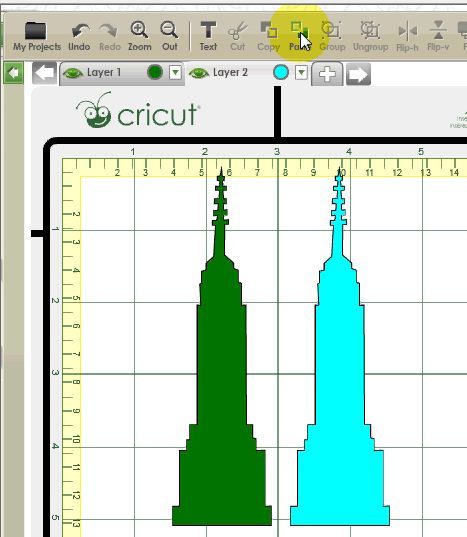
 The image will be pasted to Layer 2.


You can see that it worked because the pasted object is a different colour to the original and matches the coloured dot beside the layer name.

If you want to move your image from one layer to another instead of copying it, you can follow the instructions above and simply press the Cut button at instead of the Copy button.

Or....

You can follow the instructions above (Copy and Paste) then just go back and delete the image from the first layer after you have pasted it to the second layer.

Copying multiple images
You can use the same process to copy multiple objects. Just select them all before you click the Copy button. (There's no need to group them.) This even works for images that are on different mats!

Having problems getting it to work? Keep the following in mind....
  • Before you select the Paste button ensure that the correct layer tab is active (light grey)
  • Make sure the layer you are pasting to is visible. The eye next to your layer name should be green. (Like the picture above). If the eye is grey your layer is hidden and you won't see your pasted object.  Click the eye to make the layer visible. Once you make the layer visible the pasted image should appear.

Got any questions? Just ask!!


For information on this process using CCR builds older than 167 click here: http://cricutcraftroomblog.blogspot.com.au/2012/04/copying-objects-to-new-layer.html


Wednesday, January 9, 2013

Using the Autofill feature

This tutorial has been moved to my new blog - The Non-Crafty Crafter.  I would love it if you would use the "Join this site" option to follow me over there. 

Here's the link: http://thenon-craftycrafter.blogspot.com.au/2014/02/cricut-ccr-using-autofill-feature.html


Tuesday, April 10, 2012

Copying objects to a new layer (for CCR builds prior to 167)

For information of Copying and Pasting in CCR builds from 167 on click here: http://cricutcraftroomblog.blogspot.com.au/2013/01/copying-objects-to-new-layer-updated.html

Do you want to copy images from one mat layer and place them on a different mat layer? Well here's how you do it.

1. First, make sure you have Mat Layers enabled (Options menu, Craft Room tab).

You may also want to have Fill Mode Enabled (Options menu, Craft Room tab) but it's not necessary. For this exercise I have it turned on to make it easer to see where the layers are being pasted to.


2. Highlight the object you want to copy and click the Copy button. That image will be copied to your clipboard.


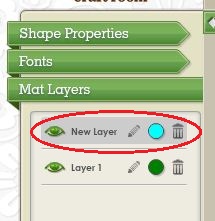
3. Click on the Mat Layers menu and click the Add New Layer button.  (Figure 1). That layer will now become the active layer. You'll know that because that layer will be highlighted in grey. (Figure 2)

If you have already added your new layer make that layer active by clicking on its name in the Layers menu so that it's highlighted. 


Figure 1

Figure 2


4. Press the Paste button. Your object will now appear on the new layer. 

You can see that it worked because the pasted object is a different colour to the original and matches the coloured dot beside the layer name.


If you wish you can now delete your original object. Or, if you want to remove (cut) your object from one layer and Paste it to another, simply press the Cut button at step 2 instead of the Copy button. 

Having problems getting it to work? Keep the following in mind....
  • Before you select the Paste button ensure that the layer name you are pasting to is highlighted. 

  • Make sure the layer you are pasting to is visible. The eye next to your layer name should be green. (Like the picture above). If the eye is grey your layer is hidden and you won't see your pasted object.

    In the picture below, the layer I have pasted to is hidden. (The eye is grey.) Even though I have pasted my object it's not visible.


Once I make the layer visible the pasted image appears.


Sunday, August 21, 2011

Build 59 causing Imagine layering problems

If you're having trouble getting the layering method to work it's not something you're doing wrong. The problem started when Build 59 was released last week. Currently all the layers are cutting separately again. Insert unhappy face here!

I'm still trying to figure out if there's still a way to print and cut all the layers as one and will post if and when I do!


Monday, August 8, 2011

More on Printing and Cutting layers with the Imagine

In this post I showed you how to group together all the layers from an image so you can print and cut the entire object.

http://cricutcraftroomblog.blogspot.com/2011/07/printing-and-cutting-disney-layers-on.html

Today I want to show you how to take that one step further, using the Hide Contour feature.

Many of the layers on the carts are made up of more than one shape. For example the Pluto image on the Mickey Font cart has a collar that doesn't align correctly because it is made up of 3 separate parts. The part on the left doesn't align properly with the other layers of the object.


This is how it looks not aligned properly beside how it should look:


Now, let me show you how to achieve that using a second copy of the collar and the Hide Contour feature.

Place all the parts of Pluto except for the collar on the mat and align them correctly on top of each other.

Don't forget to select Don't Weld on each of the layers. I just picked any old colour from the colour palette for this example.

Place two copies of the collar on the mat. You can colour them now or later when you place the object on top of the other layers. I've coloured them here so it's easier to see.

Note: Don't use Copy and Paste to create your second copy of the object. Pasted objects don't work well with the Hide Contour feature. Quite often the whole object will be hidden instead of just the contour you are clicking on. 

We only need two copies of the collar because it is only the left hand part that doesn't align. The two right hand parts are in their correct positions and don't need to be separated.


Select the first collar and click the Hide Contour button


Hover your mouse over the left hand piece of the image and click to hide it.

Press the Exit button to return to the main screen.

Your image will look like this:


Select the 2nd copy of the collar and click the Hide Contour button


This time hide the two right hand side pieces

Select Exit to return to the mat.

That piece will now look like this:

To two pieces together will look like this:


Select the larger piece and move it over and align it


Select the other piece and move it over and align it.

And you're done!


So, that was an easy one to do because we only needed to hide two parts of a layer.

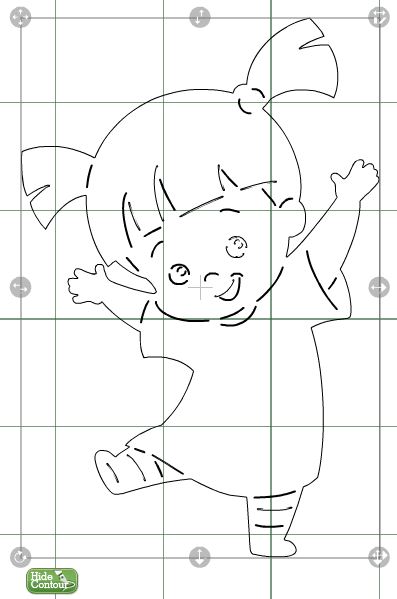
You'll find that many of the images on the carts will have layers that are made up of numerous parts. For example Boo(1) from the Best of Pixar cart has five parts to her face, arms and legs, three parts to her hair, five parts to her boots, smile and eyes and two parts to her pants. That's a lot of layers to duplicate and contours to hide!


And because there's no Blackout feature on this cart and I didn't want to use the Shadow for the background I hid all the inside contours of the Base image too. (Zoom is your best friend when doing this).


And here she is put together.


Here's another one. This is Dash from the Best of Pixar and it was a marathon effort.


Please ignore his pink eyes. I forgot to change them back to white before I printed him!