Showing posts with label Cricut. Show all posts

Monday, April 21, 2014

Free Box Card cut file for Design Space

For those of you with the Cricut Explore, I am sharing a Design Space Box Card cut file over on my new blog. It's a Box Card with a twist!

If you're interested head over to http://thenon-craftycrafter.blogspot.com.au/2014/04/cricut-free-box-card-cut-file-for-you.html

All you have to do is become a follower over there and leave a comment on the post with your email address. Once I've verified you're a follower I'll email you the link to the file. :)

Oh, and it's free!!!


Thursday, April 17, 2014

It's a Pinterest party over at the Non-Crafty Crafter!


Hi everyone...

Feel like some Pinspiration???  Come on over to my Non-Crafty Crafter blog and join the Pinterest party! It's running all week and should be a lot of fun.

What's a Pinterest party you ask??? It's simple.... you find a craft project on Pinterest and use it as inspiration to make your project.

Here's the link... would love you to join in!


Here's the card I made.


Tuesday, March 11, 2014

Looking for the Cricut Cartridge list and Cricut Font list?

You'll find the updated lists on my new blog:


The complete guide to Cricut Fonts:


Full list of carts - physical and digital (including links to handbooks): http://thenon-craftycrafter.blogspot.com.au/2014/03/cricut-full-list-of-cricut-cartridges.html


List of carts with fonts - with samples of every font: http://thenon-craftycrafter.blogspot.com.au/2013/02/cricut-carts-containing-fonts-with.html


Don't forget to follow me over there by clicking the "Join this Site"button.


Wednesday, January 16, 2013

Copying objects to a new layer (updated)

Do you want to copy or move images from one mat layer and place them on a different mat layer? Well here's how you do it.

Download a PDF of  this tutorial from here: https://www.box.com/s/z77t7d08meyhsiu77m24

  • Place your image on the mat


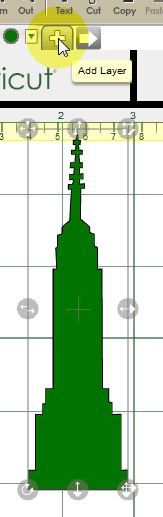
  • Click the + button next to the Layer 1 tab.

A new layer (Layer2) will be added to your project.


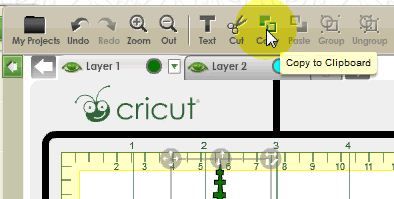
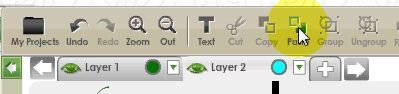
  • Click on your first image to make sure it's selected then press the Copy button on the toolbar

The image will be copied to the clipboard.

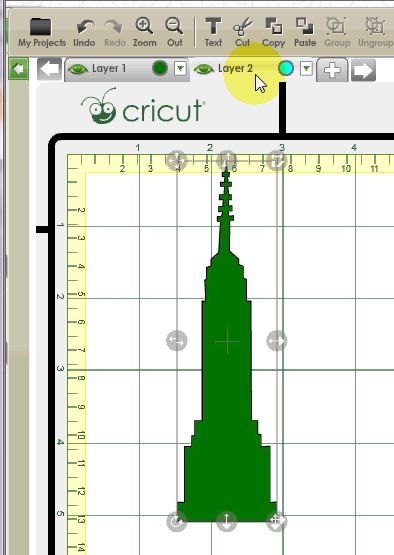
  • Click on the tab for Layer2 to make it active. (It will turn light grey.)
  • From the toolbar click the Paste button 

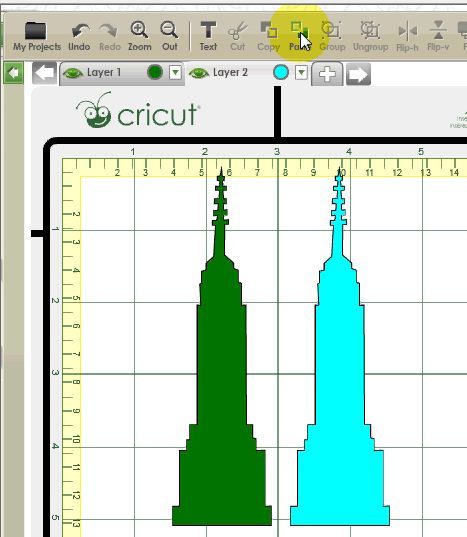
 The image will be pasted to Layer 2.


You can see that it worked because the pasted object is a different colour to the original and matches the coloured dot beside the layer name.

If you want to move your image from one layer to another instead of copying it, you can follow the instructions above and simply press the Cut button at instead of the Copy button.

Or....

You can follow the instructions above (Copy and Paste) then just go back and delete the image from the first layer after you have pasted it to the second layer.

Copying multiple images
You can use the same process to copy multiple objects. Just select them all before you click the Copy button. (There's no need to group them.) This even works for images that are on different mats!

Having problems getting it to work? Keep the following in mind....
  • Before you select the Paste button ensure that the correct layer tab is active (light grey)
  • Make sure the layer you are pasting to is visible. The eye next to your layer name should be green. (Like the picture above). If the eye is grey your layer is hidden and you won't see your pasted object.  Click the eye to make the layer visible. Once you make the layer visible the pasted image should appear.

Got any questions? Just ask!!


For information on this process using CCR builds older than 167 click here: http://cricutcraftroomblog.blogspot.com.au/2012/04/copying-objects-to-new-layer.html


Thursday, January 10, 2013

Full list of Cricut Cartridges with links

You'll now find my cartridge listing over on my new blog here: Full list of Cricut carts

Wednesday, January 9, 2013

Using the Autofill feature

This tutorial has been moved to my new blog - The Non-Crafty Crafter.  I would love it if you would use the "Join this site" option to follow me over there. 

Here's the link: http://thenon-craftycrafter.blogspot.com.au/2014/02/cricut-ccr-using-autofill-feature.html


Getting started

Cricut Craft Room (CCR) is an internet based program that is both PC and Mac compatible. Its performance to some degree will rely on the speed of your computer and of your internet connection.
There are two versions of CCR. The "Web" version and the "Desktop" version. Don't be fooled by the names though. You need to be online to use both versions.

The Web version is a design only version. You can create and save your projects from any computer that meets the system requirements. Any files you create will be available for you to cut when you sign in to the Desktop version.

The Web version can be accessed from here: http://craftroom.cricut.com/

The Desktop version allows you to design and cut your projects. You will access this version from an icon on your desktop.

Your cricut.com email address allows you to sign in to the Desktop version on two computers. These designated computers can be changed every six months by contacting Provocraft customer service.


Downloading and Installing the Desktop version of Cricut Craft Room


These are the instructions for those using a PC. Hopefully it will help you Mac users too!
  • Click on the Craft Room link from the menu at the top of the Cricut.com (or message board) screen.
  • Click either the PC or Mac button depending on which type of computer you are using.

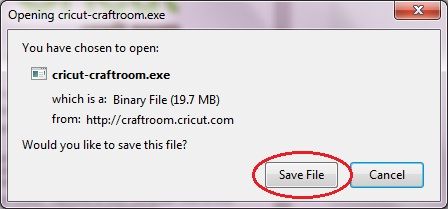
  • Click the Save File button


  • Select a save destination and click Save

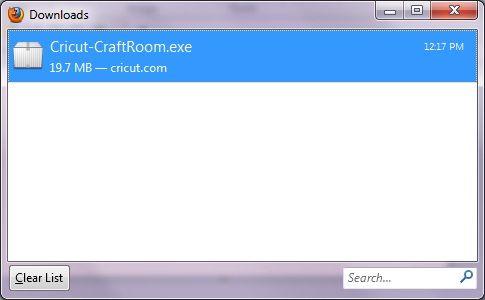
The installation file will start to download


  • When the download is complete double click on the Cricut-CraftRoom.exe download to start the installation


  • Click the Run button


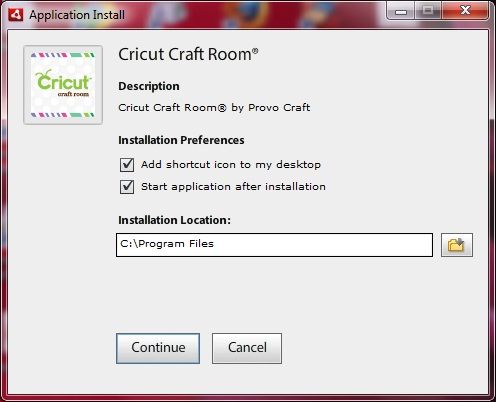
  • After a short wait (my computer takes about 20 - 25 seconds) this box will appear. Click the Continue button


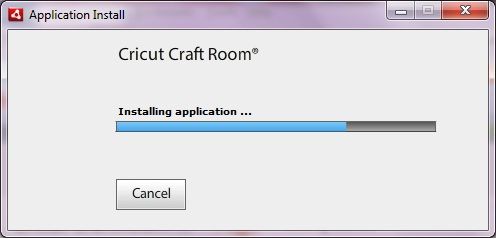
The program will start to install


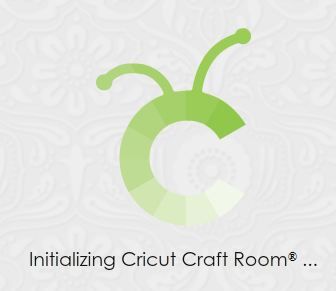
 Once CCR has finished installing it will open the Initializing screen


If you can't get past this stage either your anti-virus program is blocking it and/or you're using Windows 8. You'll find info on both of those issues elsewhere on this blog.


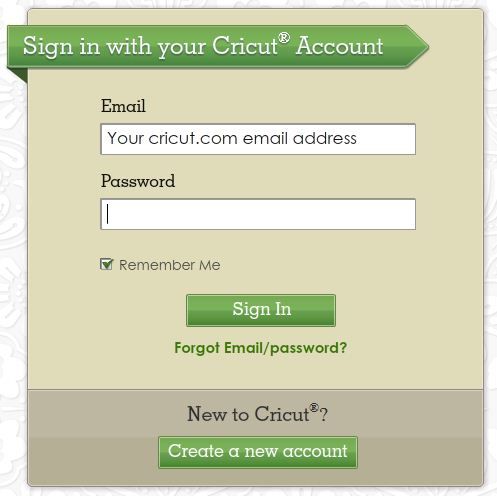
CCR will then open to the Sign In screen


  • Insert your cricut.com email address in the Email box and your Cricut.com password in the Password box
  •  Check the Remember Me box so you don't have to complete those details again
  • Press the Sign In button


The main CCR screen will open and you're ready to start designing.


To learn about the different parts of the CCR screen including the menus just click on the Nitty Gritty tab above!


Or if you want to jump straight in and add some objects to your mat and learn more of the basics click on the The Basics tab.


    Friday, June 29, 2012

    Using Imagine Art cartridges in the Cricut Expression

    Last week I received an email from a lovely lady called Suzanne. Suzanne has a Cricut Expression and recently purchased an Imagine Art cartridge not realising that she couldn't use it in her machine.

    Before she put it up for sale on eBay she emailed me to ask if there was any way she could use that cartridge.

    My immediate thought was that as there's no Imagine slot in the the Expression, the answer would be no. But then I thought about it a bit more and realised there is a way.... by using Cricut Craft Room!!

    First, you will need a friend who will let you link the Imagine cartridge to your cricut.com account using their Imagine or Expression2. (Make sure you're logged into your account, not there's!!)

    Once you've accomplished that all you need to do is connect your Expression to your computer, create your design using the linked Imagine cartridge and send it off to cut!

    This should also work with the Cricut Personal, Create and Mini. (I haven't tried them but I see no reason why it won't work.)

    Don't have a friend with an Imagine or E2? All is not lost. This will also work with the Digital Imagine cartridges that you can purchase from Cricut.com.

    Surely it can't be that easy???? Well... there are a couple of things to keep in mind.
    • As the Expression doesn't have any printing capabilities you will only be able to cut the images from the cart. For the same reason you can't use the Imsgine Colors and Patterns carts.
    • You will need to edit the images before you cut them as they are made up of multiple layers. For example this image from the Best Friends cartridge looks like this in CCR when the Imagine is selected as the default machine:

    And like this if the Expression is chosen:


    If you were to cut the image as it appears above this is what you'll get:


    A jumbled mess of useless body parts! That's because every single line in the image is cut. To get a useful cut of the image here's what you need to do.

    Select the image on the mat and click the Edit Group button


    The Combine/Separate buttons will appear in the right corner of the screen. Click the Separate button.

    Now your image will look like this:


    Click the Exit button (or press Esc) to go back to the mat screen.

    Now when you cut your project, each of the five layers will cut separately. At the moment they are automatically grouped. To move the individual pieces around on the mat click the Ungroup button on the toolbar. You can then space each piece out on the mat allowing you to load your mat with different colours of cardstock.

    Remember, if you want to resize the image once you've ungrouped it, you will need to select all the pieces by using Ctrl A (Cmd A) or select Edit, Select All. Then use the resize handle to increase or decrease the size of all the pieces at the same time.

    As you can see from the image above, you will lose the facial features of the image as those parts are only printed. Time to break out those Peachy Keen stamps you've got stashed in your drawer!

    Play around with the different Imagine cartridges in CCR before you start purchasing them. Some images will work better than others.

    Here's another example:

    An image from the JT Imagine cart as it would print:


    That image when the layers have been separated (still with the Imagine selected as the default machine):


    And how it looks when the Expression is selected as the default machine:


    So if you're one of those cartridge collectors that has accidentally purchased an Imagine Art cartridge, all is not lost! Have fun experimenting. 


    Sunday, December 11, 2011

    Using the Cricut Pens with CCR and the E2

    If you've been wondering if you can use the Cricut pens when you're using Cricut Craft Room, the answer is yes. The E2 is the easiest to use for this exercise as it doesn't automatically unload the mat when it has finished cutting. This allows you to remove the pen and replace it with the blade.

    The Expression on the other hand (and most likely the Cricut Personal and the Cricut Create) do unload the mat after it has finished cutting when using CCR. This means that it's difficult to reload the mat in exactly the same position the second time, which can result in your cutting line not exactly lining up with the drawn line. But it can be done. You need to take care when you load the mat. Load it snugly to the right hand side for both the drawing and the cutting and you should get your two layers to line up.

    I haven't been able to use the Cricut Pens on the Imagine while using CCR. For some reason it just unloads the mat instead of drawing the design. The Cricut Pens do work with the Imagine however if you're not using CCR. Go figure!

    I don't have a Cricut Mini so have no idea whether it works with the pens but I suspect it would.

    Here's the instructions for using the pens using the E2.

    I'm using the Window image from the Christmas (Solutions) cartridge.
    • Place your image on the mat and poisition it to where you want it.

      • Remove the blade housing from the E2 and replace it with your pen.

      • Make sure your E2 is connected to your computer and powered on.
      • Press the Cut button

      • Select your Expression 2 then press the Select Device button


      If your cartridge isn't linked to your Cricut.com account you will be prompted to insert the cartridge if you don't already have it in the machine. 

      • You can change the blade depth and speed here. The recommended settings for the pens are a speed of 3 and a pressure of 2 however you should experiment with what works best for you.

      • Press the Cut button to send the project to the Cricut.

      • Load your mat into the E2 using the Load mat button on the E2's Home screen.
      • Press the Continue button on the CCR screen.

      You'll see this box and the project will shortly start to "cut" with the Cricut pen.


      When the E2 has finished drawing your image it should stop and not return to its home position.


      CCR will return to the mat screen.
      • Very carefully (making sure you don't move the blade carriage) remove the pen from the housing and replace it with your blade.

      • Again, press the Cut button, select the E2 and press Select Device
      • Adjust your blade depth settings to suit your cardstock
      • Press Cut
      • Press Continue
      The blade housing will return to the top right of the mat then proceed to cut the design on top of the drawn layer.
      • Press the Eject Mat button on the E2 and your should see something like this:


      And here it is removed from the mat.


      Not too shabby!