Here's the latest in my quest to update all the old tutorials! More coming soon....
Originally published May 2011
Updated January 2013 for new CCR layout from Build #167 onwards
The CCR Main screen
So you've just successfully opened CCR. Now it's time to get to know the screen layout.
Here's a picture of the main screen. (Click to enlarge)
And here's a close up of the bottom row of buttons
:
The main screen of CCR is made up of:
- The Toolbar (or the Editor)
- Content Drawers with Images/Cartridges and Image Search tabs. If you have the Imagine selected as the default machine there will also be a Bonus tab.
- Virtual mat - The mat will be have a green border if the Personal, Create or Mini is selected as the default machine. If the Imagine, Expression or E2 is selected as the default machine the mat will have a grey border. If the Cake or Cake mini is selected it will have a pink border. This is to reflect what the actual mats look like.
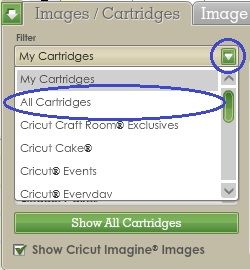
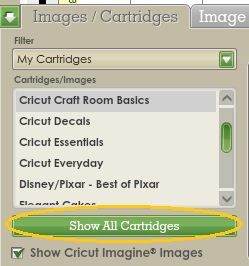
- The Image/Cartridge drawer
- The File, Edit, Options & Help menus
- The Cut button (which changes to a Go button if you have the Imagine selected as your default machine in the Machine & Mat menu.)
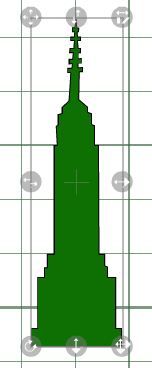
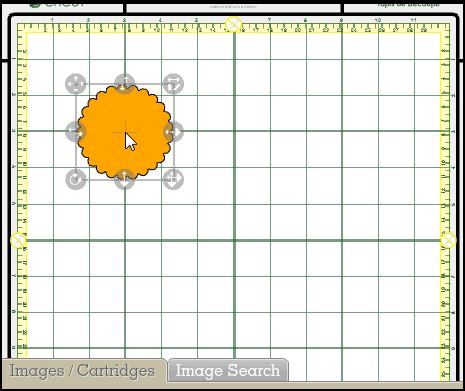
You will see a yellow shaded area around the perimeter of the mat, as well as this symbol:
These indicate the cutting boundaries of the Cricut. That’s approximately ¼ of an inch on all 4 sides. When creating your design remember to keep those boundaries in mind. Any image that goes past that boundary or is placed outside that boundary will not cut.
Toolbar/Editor
At the top of the CCR screen is the Toolbar/Editor. The toolbar buttons are as follows:
| My Projects: Clicking on the My Projects button opens the list of your saved projects. From here you can open, rename and delete a project as well as import and export a project. |
 | Undo/Redo: Use the Undo button to reverse a change you have just made to an object. Use Redo to change the object back to how it was before you used the Undo button.
The number of changes you can undo and redo appears to be unlimited, provided you don’t close the file. |
 | Zoom: Press the Zoom button to enlarge the view of the images on the mat so that they are easier to see. This is useful for checking to see how far your welded images are overlapped.
To go back to full screen press the Out button. Zooming does not change the actual size of the objects. |
| | Text: Use to Text button to add a text box to your project. |
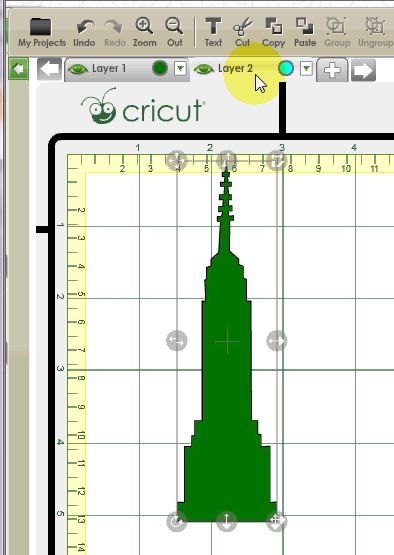
 | Cut: To move an object from one layer to another, select the object then press the Cut button. This will remove the object from your mat and place it onto the clipboard ready to be pasted on to another layer of your file. You can also paste the image into another file. |
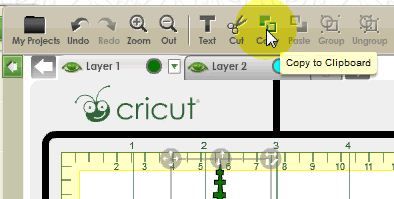
 | Copy: To copy an object select it and press the Copy button. This places a copy of the object on the clipboard ready to be pasted to another position on the mat or another layer or file. |
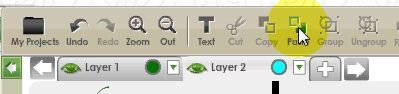
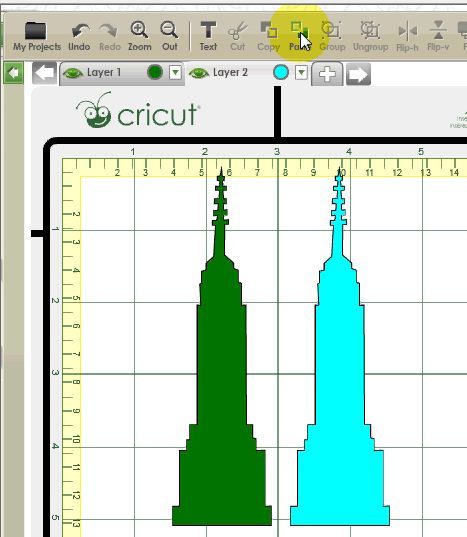
 | Paste: Press the Paste button to place the contents of the clipboard onto the mat.
To paste to another layer click on that layers tab then press the Paste button.
To paste to another file, click the Open button from the file menus, navigate to the necessary layer then press the Paste button. (You will be prompted to save your current file first.) |
 | Group: If you have multiple objects on your mat and you group them they become one object. Grouping isn’t necessary if you just want to resize multiple object but it does make it easier to move multiple objects around on or between mats. |
 | Ungroup: Press this button to ungroup your currently selected object. |
 | Flip horizontal: Press this button to flip your selected object horizontally. (Left to right) |
 | Flip vertical: Press this button to flip your selected object vertically. (Top to bottom) |
 | Send to front: Send the currently selected shape in front of any other shapes on the mat. |
 | Send to back: As above |
 | Delete: Press this button to delete the currently selected object/s. (You can also use the Delete key on your keypad.) |
 | Width/Height: You can set the absolute size of your objects here. The icon in between the two input boxes is used to turn Constrain Width and Height on or off. When it is black (as pictured) it is on. If you change one of the numbers in either box the other number will change to keep your object in proportion.
If you don't want both figures to change press the Constrain button and it will turn grey. Now if you change the width of an object the height won't change too. This is useful if you're changing the size of a rectangle for example and you only want to change its width or height. |
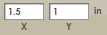 | X/Y coordinates: These figures display where an object is positioned on the mat. X is across and Y is down. In the above example the object would be 1.5 inches from the left side of the mat and 1 inch down from the top of the mat. |
The Menus
On the left side of the screen you will see five menus.
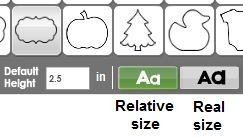
Shape Properties
The first menu is the Shapes Properties menu. These properties control the Rotation, Slant, Quantity and Auto Fill Width of your images. You can also change the size and position of your images here. (These are the same measurements that you will see on the top toolbar.)
Rotate
You can rotate an image by deleting the current value and typing a number in the Rotate input box. After you have changed the value you can either press enter or click on the grey arrow.
You can also use the green up and down arrows to change the rotation of your image by one degree per mouse click.
You can also change the rotation by clicking and dragging the Rotate handle on the object.
Slant
You can slant your objects by changing the settings in the Slant boxes.
The first box changes the slant from left to right. A positive figure (eg 20) will slant the object to the right. A negative figure (eg -20) will slant the object to the left.
The second slant box changes the slant from top to bottom.
You can also use the green arrow keys in the slant box to change the slant. You will see the object change as you click the arrow.
You can also change the slant of an object by using the slant handle. Click the handle and either move your object to the left/right, or up/down.
Image Quantity
The Image Quantity feature is the quickest way to create multiples of the same object .
Place your first object on the mat and make any necessary changes (scale, rotate, slant or hide contour). All changes will be applied to the copied objects.
With your object selected, change the number in the Image Quantity box and press the Apply button.
Your mat will now contain the selected number of objects.
Auto Fill
Use Auto Fill to fill an entire mat (or part of the mat) with the same object.
Place your first object on the mat and make any required changes (scale, rotate, slant or hide contour). When using Auto Fill it doesn't matter where you place your image on the mat.
Set the size of your cardstock using the Auto Fill Width and Height input boxes. If you want to fill the whole mat then leave the settings at 12" x 12".
If you're using a smaller piece of cardstock then put its measurements in the boxes. Below I am using an 8.5" x 11" sheet of cardstock so I place those figures in the box.
(For some reason CCR automatically changed the figures to 8.55 x 11.05.)
Press the Apply button and your selected paper size will be filled with the selected object. Notice that the first object has moved to the top left corner.
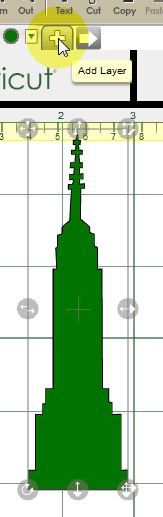
The Text Menu
There are two ways to insert text in CCR. You can select a cartridge from the cartridge library then drag your letters directly from the overlay to the mat (you can't use your keypad to type your word like you can in Design Studio) or the better way is to use a Text Box.
Click the green "Add New Text Box" button. (You can also click the Text button from the toolbar or the Add Text button on the keypad. That button will only show if you have selected a cartridge that has a font on it and one of the font tabs has been selected.)
A text field box will appear in the top left corner of your mat.
You can move this box to another position on the mat by left clicking anywhere on the grey area around the input box and dragging it to where you want it. The text you type in the box will appear under the text field box.
Use your keypad to type your text into the text field box. For some fonts you will use the shift key on your keypad to use Upper case. Other fonts will have the Lower case and Upper case as a different creative feature.
Below the 3 Birds on Parade has been selected.
While the text box is still on your screen you can change the font by selecting a different one from the drop down cartridge list. The font will change on your screen.
When you have finished typing your text press the Done button or click somewhere else on the mat.
Your text will now have handles around it and will have an Edit Text button in the bottom left corner.
Your text will also be grouped, meaning that if you click anywhere on that word the whole word will be selected. Grouping is different to Welding though. If you cut the word as it appears now each letter will still be cut separately and not joined to the next letter.
Pressing the Edit Text button reopens the text field box so you can change what you have typed.
You can change which cartridge you have used at any time by selecting your text so the handles are showing and choosing another cart from the drop down list.
All the options on the toolbar are available to your text. For example you can ungroup your text and move/resize/rotate/slant etc individual letters from the group.
Be aware that once you ungroup/regroup your text the Edit Text button will no longer be available and will be replaced with an Edit Group button.
If you want to change the font used or its creative feature you will need to recreate your text box.

The drop down Creative Feature menu is used in the same way that the Creative Feature buttons are used on the keypad overlays with one difference.
Selecting a different feature key changes your text instantly. You don't have to select the feature before you type the text (as you do in Design Studio or on the Cricut itself.)
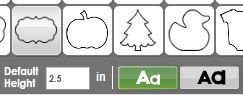
There are three other options in the Fonts menu - Font Size, Letter Spacing and slant.
Change the size of the text in your text box by pressing the up or down arrows. You can also type the size you want in the box (eg. 2.25) then press Enter or press anywhere on the grey background.
Change the space between your letters (kerning) by clicking on the up or down arrows or typing a number in the box. Letter spacing is mainly used for
welding although it is also a great way to conserve your paper by moving your letters closer together.
More on Letter Spacing below.
Change the slant of your word by clicking on the up or down arrows or by typing a number in the box. The first box is used for horizontal slant and the second for vertical slant.
Letter Spacing:
You have two options for your letter spacing - Character Space and Block.
Character space spaces the letters proportionally and works best if you are going to be welding your letters.
Here's an example of a word using Character spacing both unwelded and welded. (Notice how in the unwelded version the "t" is over the "r" and the "y".)
Block spaces each letter by the exact same amount regardless of how wide the letter is.
(Imagine the same size rectangle being placed between the letters.)
When you change the spacing when block is selected the welded word doesn't look as neat. I had to make the spacing much smaller to get the "t" to move over to the "r" which in turn pushed the "a" and the "r" too far over.
The Colors & Patterns Menu
If you have an Imagine then this section is for you!
Using the Colors and Patterns menu you can fill objects from any cartridge with a color or a pattern and print and cut them on your Imagine.
The first thing you need to do to use the Colors and Patterns feature is change your default machine to the Imagine.
Click on the Machine & Mat Menu (right below the Colors & Patterns menu.)
Select the Cricut Imagine from the Default Machine drop down menu.
Your Cut button will change to a Go button.
And the layers tabs will no longer have a Preview colour button.
Now it's time to fill some shapes! First we'll use some shapes from a Non-Imagine cartridge.
Note: Welding images together that you have filled with a colour or pattern will cause them all to take on the same colour/pattern. At the moment there is no way around this.
Select a cartridge from the library and place an image on the mat.
On my mat I've placed the layers from the Cupcake image from the Birthday Bash cart.
Rather than place different colours of cardstock on the mat I'll colour each layer of the image using the Colors & Patterns list and print and cut them on the Imagine.
Select the first object on the mat.
From the Colors & Patterns menu click on the first tab (which defaults to Patterns) and select Colors.
This will show you the colors from the currently selected cartridge. In this case it's showing the basic color palette from the All Wrapped Up cart.
You can change to a different cart by clicking on the drop down box below the Colors/Patterns box.
You can select a colour from any of the Imagine carts - even if you don't own it. CCR will calculate the RGB value for the colour you have selected and print it out. You won't be prompted to insert the cart that you don't own....
unless you are also trying to cut from that cart.
To use a different colour to those shown in the Color palette, click on the arrow beneath the palette.
You can select from any of the preset Basic Colors...
...or you can click anywhere on the wheel to select your colour. Use the slider to change from light to dark.
If you know the RGB colour value you can enter those details in their correct boxes. Search the internet for RGB codes for all your favourite cardstock or character colours.
Type the RGB values in their correct box (using the tab key doesn't appear to work here) and press the Apply button. (
Don't forget to write down the RGB code before you press Apply as CCR doesn't save it for you.)
Your image will be flooded with the selected colour.
Now repeat the process for each of your images.
If you want to remove the colour from an image click on the No Fill button.
Now your images are ready to send to the Imagine for printing and cutting.
Filling images with a pattern is very similar, but you have a couple of extra options.
Select Patterns from the drop down menu.
Place an image on the mat then select the Imagine cartridge you want to use from the Pattern Gallery drop down menu.
Click on the pattern you want to use and after a brief pause (you'll see the little clock appear on screen) your image will be filled with that pattern.
You can now Flip the pattern horizontally and/or vertically by clicking on those button in the Colors & Patterns menu.
Note, this does not flip the object, but the pattern inside the object.
You can also increase or decrease the size of the pattern by clicking on the Scale Pattern + or - button.
And lastly, you can move the pattern around inside of the object by clicking on the green position arrows . This is useful if there is a certain part of the pattern you want to feature.
Next we'll look at using Colors and Patterns with Imagine images.
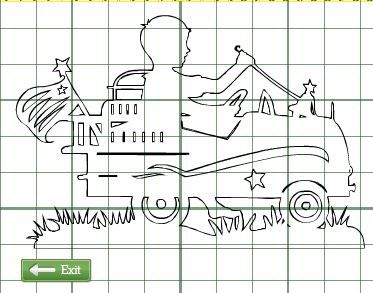
Place an image from an Imagine cart on your CCR mat.
If you select the image and fill it with a pattern (or color) from the Colors & Patterns Gallery this is what happens. The whole image is filled with that pattern.
There's a couple of steps you need to do to fill the different parts of the image.
In this image I want to change the colour of the babushka's scarf.
With the image selected press the Edit Group button.
You will then see the Combine/Separate box
. Click the separate button.
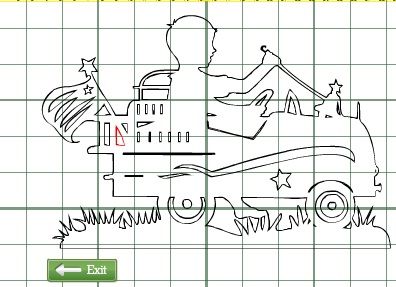
The image will be separated into its individual layers.
Click on the middle image (the scarf) to select it.
Select a pattern (or color) from the Colors & Patterns gallery and the scarf will be filled.
Press the Combine button to place the layers back together.
Press the Exit button to exit out of the Edit Group function and you're done!
The Machine & Mat Menu
The Machine and Mat menu is where you will set your default Cricut Machine. Click on the drop down menu and select one of the machine. The mat screen will change to reflect which Machine you have selected.
Depending on which machine you select you may have an option of what size mat you want to use.
The Expression, the E2 and the Cricut Cake will allow you to select the 12"x12" mat or the 12"x24" mat.
The Personal, Create and the Cake Mini only have a 6" x 12" option.
The Cricut Mini has just an 8.5" x 12" mat option.
The Imagine has just a 12" x 12" mat option.
The Measuring Units option allows you to select from Inches, Millimeters, Centimeters, Pica and Points.
Here's some conversion information that might come in handy if you ever want to design in anything other than inches.
1 inch = 25.4 millimeters
1 inch = 2.54 centimeters
1 inch = 6 pica
1 inch = 72 points
The final part of the Machine & Mat menu allows you to rename your current file.
Click on the Pencil icon and delete the current name (press the delete key or click the x) or overtype it with a new name. Press Enter to save.
The Help & Feedback Menu
And finally on our journey through the menus we come to the Help & Feedback menu!
If you want to watch some CCR videos tutorials, find some help, read the FAQ's or give your feedback about the program to Cricut.com this is the place to do it!


