Wednesday, January 9, 2013

Getting started

Cricut Craft Room (CCR) is an internet based program that is both PC and Mac compatible. Its performance to some degree will rely on the speed of your computer and of your internet connection.
There are two versions of CCR. The "Web" version and the "Desktop" version. Don't be fooled by the names though. You need to be online to use both versions.

The Web version is a design only version. You can create and save your projects from any computer that meets the system requirements. Any files you create will be available for you to cut when you sign in to the Desktop version.

The Web version can be accessed from here: http://craftroom.cricut.com/

The Desktop version allows you to design and cut your projects. You will access this version from an icon on your desktop.

Your cricut.com email address allows you to sign in to the Desktop version on two computers. These designated computers can be changed every six months by contacting Provocraft customer service.


Downloading and Installing the Desktop version of Cricut Craft Room


These are the instructions for those using a PC. Hopefully it will help you Mac users too!
  • Click on the Craft Room link from the menu at the top of the Cricut.com (or message board) screen.
  • Click either the PC or Mac button depending on which type of computer you are using.

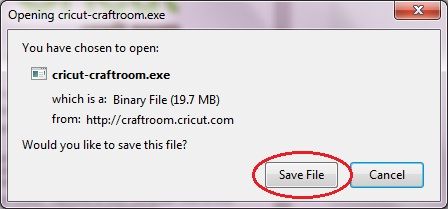
  • Click the Save File button


  • Select a save destination and click Save

The installation file will start to download


  • When the download is complete double click on the Cricut-CraftRoom.exe download to start the installation
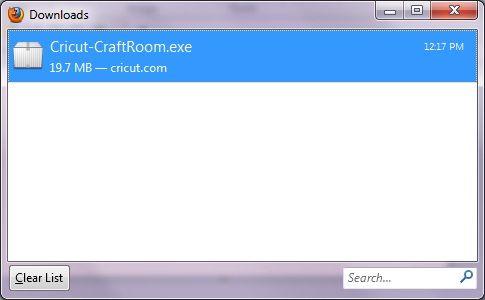


  • Click the Run button


  • After a short wait (my computer takes about 20 - 25 seconds) this box will appear. Click the Continue button
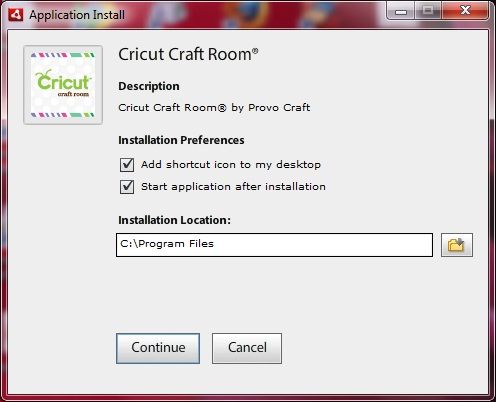


The program will start to install
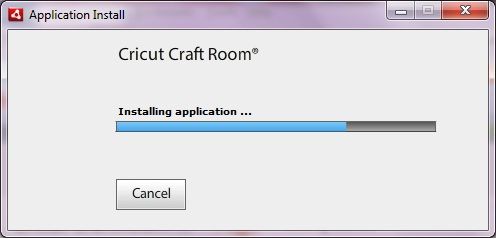


 Once CCR has finished installing it will open the Initializing screen



If you can't get past this stage either your anti-virus program is blocking it and/or you're using Windows 8. You'll find info on both of those issues elsewhere on this blog.


CCR will then open to the Sign In screen
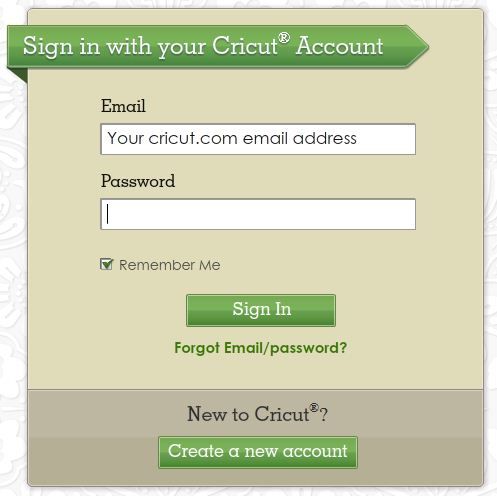


  • Insert your cricut.com email address in the Email box and your Cricut.com password in the Password box
  •  Check the Remember Me box so you don't have to complete those details again
  • Press the Sign In button


The main CCR screen will open and you're ready to start designing.


To learn about the different parts of the CCR screen including the menus just click on the Nitty Gritty tab above!


Or if you want to jump straight in and add some objects to your mat and learn more of the basics click on the The Basics tab.



    Tuesday, January 8, 2013

    Updating tutorials


    Hi everyone.
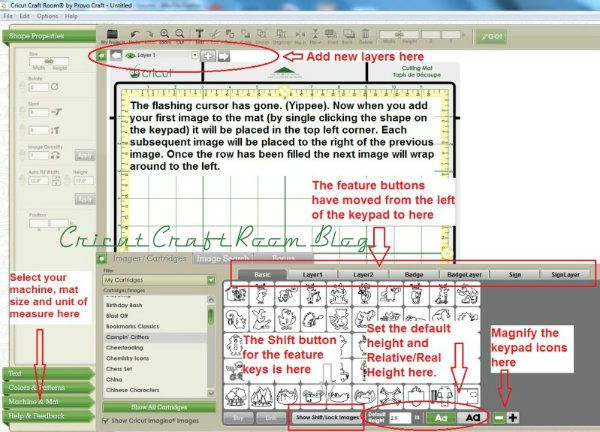
    There's been a lot of changes to CCR since I started this blog. And that means that many of the tutorials are now out of date. Starting today I'll be updating the old tutorials with any new information/screenshots. Once I've finished one I'll repost it. So don't get confused if you see "new posts" that you've actually already seen!

    The first one "Downloading and Installing CCR" will be up shortly.

    If I find any that need to be done urgently (because the old information is confusing people) I'll do those first!


    CCR and Norton internet anti-virus

    If you have Norton anti-virus and are stuck in the endless Initializing Cricut Craft Room... then this tutorial is for you! (Please note - these instructions are not for Norton 360, just the plain vanilla Norton Anti virus.)

    Big thanks to Sara Andrews for sending me some of the screen shots!!!! I don't have Norton on my laptop but eventually dragged out my old laptop and downloaded the trial version to make sure this worked!)


    Are you ready? Then exit out of CCR and do the following:

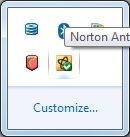
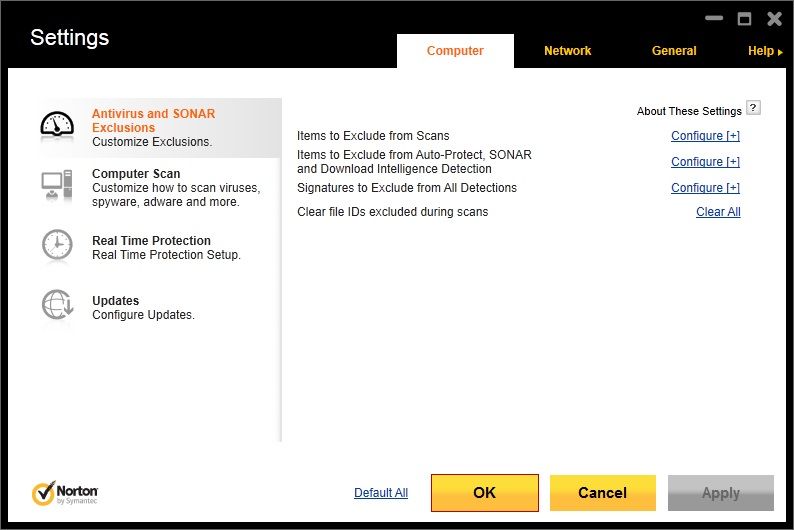
    1. Click the little up arrow in the bottom right of your screen and left Click the Norton icon


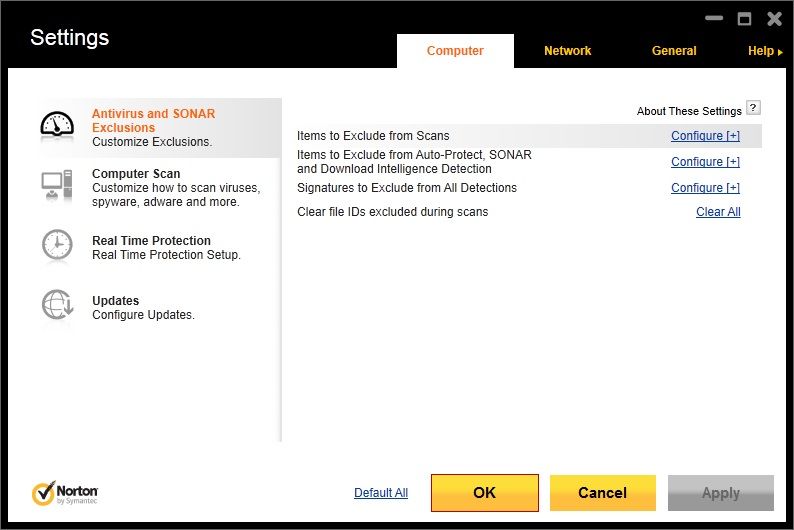
    2. Select Settings


    3. Select the Computer tab then highlight Antivirus and Sonar Exclusions (if it isn't already highlighted)


    4. Click on "Items to Exclude from Scans" (or click Configure next to it)


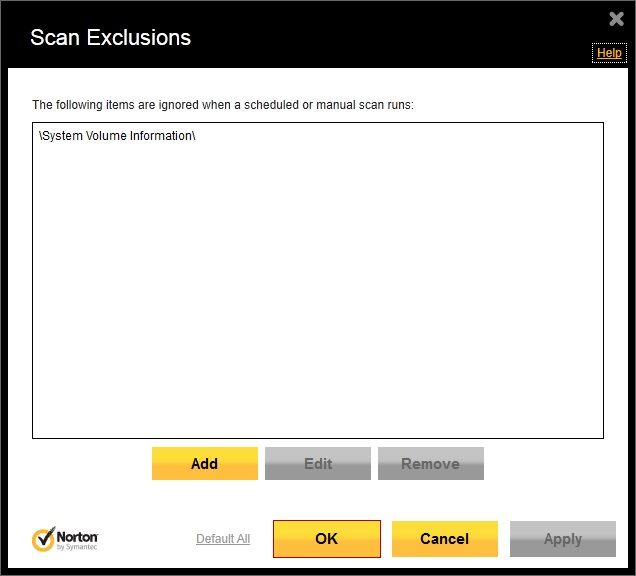
    5. Click the Add button


    6. Uncheck "include subfolders"


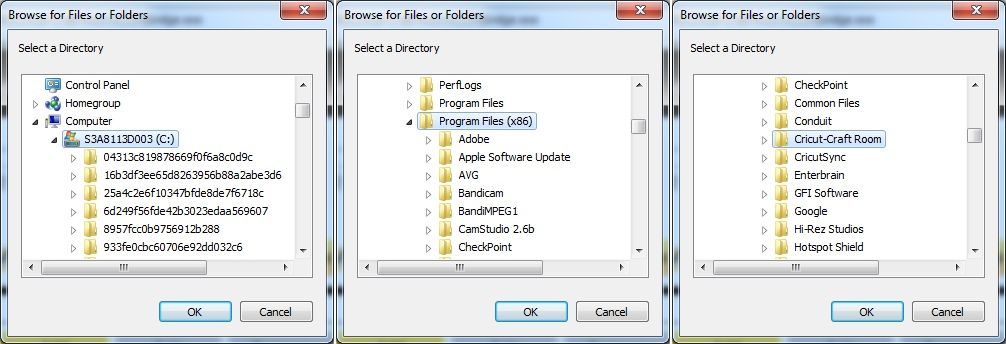
    7. Click on the folder icon  

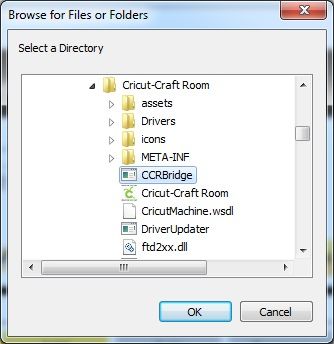
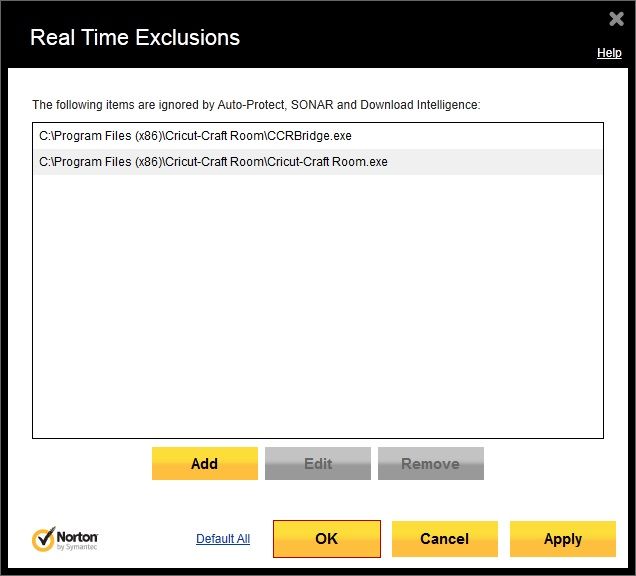
    8. Navigate to C:/Program Files (x86)/Cricut-Craft Room


    9. Click CCRBridge then OK


    10. Click OK


    11. Click the Add button again.

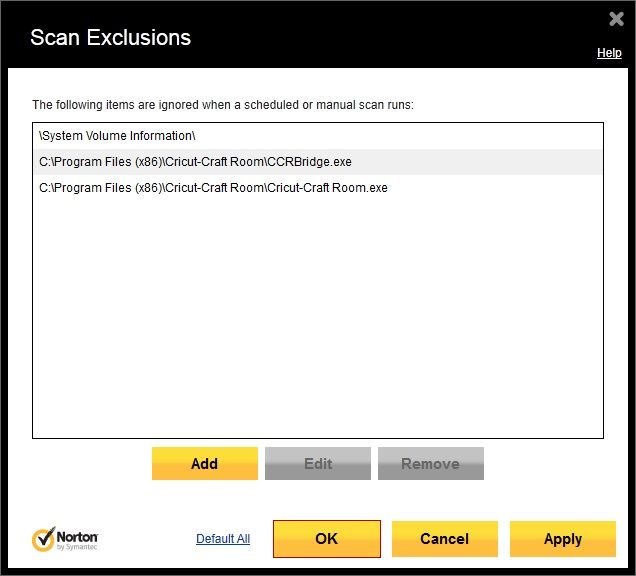
    12. Repeat steps 6 - 10, this time adding Cricut-Craft Room. (Don't forget to uncheck the "include subfolders" box again.)


    13. When that's done click the Apply button

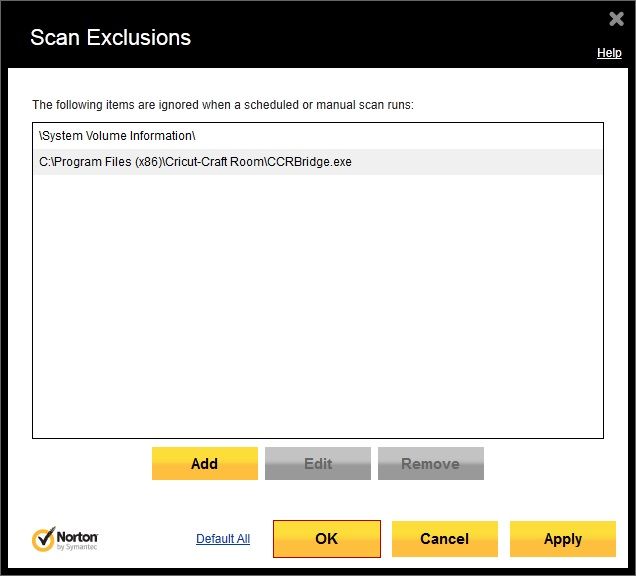
    14. Click the OK button which will take you back to here:


    You're half way there!!!

    15.  Click on "Items to Exclude from Auto-Protect, SONAR and Download Intelligence Detection"

    16. Now you're going to repeat steps 6 - 12 above to add CCRBridge and Cricut-Craft Room as exclusions here. Don't forget to uncheck "Include subfolders" for both items. When you've done that you should be back at this screen:


    17. Click Apply

    18. Click OK


    19. Click OK

    20. Click the X in the top right corner of the Norton window to close it.


    21. Now take a deep breath, cross everything and try accessing CCR again.

    Good luck!!!!


    Monday, January 7, 2013

    Cutting layered single CCR images


    Hello to all my lovely readers! I'm finally back with a tutorial for you. I have been so totally slack the last couple of months and have neglected this blog (and my Cricut Lovers Guide to Design Studio blog) for too long!

    Anyway, on to the tutorial.... (don't run away just because I'm talking about the Imagine. There's something here for everyone no matter which Cricut they have!)


    You may have seen that there are now single images available to purchase for use in CCR. There's lots to choose from. Some of them however, have been layered ready for printing and cutting as one image on the Imagine.

    So far you'll find Imagine ready images from Cindy Loo, Create A Critter and the mascots from Team Spirit. There's lots of other single images available on CCR now, but most of them haven't had the layering done to automatically print and cut on the Imagine.

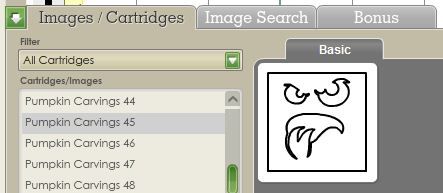
    To tell if an image is "Imagine Ready" look at the CCR keypad. If the image preview appears in colour then it can be printed and cut on the Imagine. You'll notice it also has a tab titled Layered Images. That's a pretty big clue too! :)


    If the preview appears in black and white then it won't be ready to print on the Imagine until you fill it with a colour or pattern from one of the Imagine carts.


    So what do you need to do to print and cut the coloured single images? If you have an Imagine, simply place the image on your CCR mat, resize it if necessary and send it off to your Imagine. It will be printed and cut as one image. (Meaning that the layers won't be separated into separate objects.)

    But what if you want to have some dimension for your image and cut each layer separately? No problem! Let's use Create A Critter -50 as an example.....

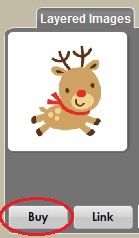
    • First up, to cut that image you will need to purchase it from Cricut.com. Click on the Buy button below the image.


    You will be taken to the Cricut.com shopping site where you can purchase that image (and any others you want to purchase.)
    • Once your purchase is complete come back to CCR and log out. When you log back in the images you purchased will now appear in bold in the list of cartridges. They will also be added to your My Cartridges library.
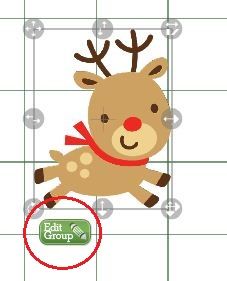
    • Select the image from the library and either single click to add it to the mat, or drag it from the keypad to your mat. The first picture below is what the image will look like if the Imagine is selected as the Default Machine in the Machine & Mat menu.

      The second picture is how the image will look if any other Cricut is selected as the default machine.


    The next step is to separate the layers on the image.

    • With the image on your mat selected, press the Edit Group Button.


    In the top right corner you will see the Combine/Separate boxes.


    •  Click the brown Separate button

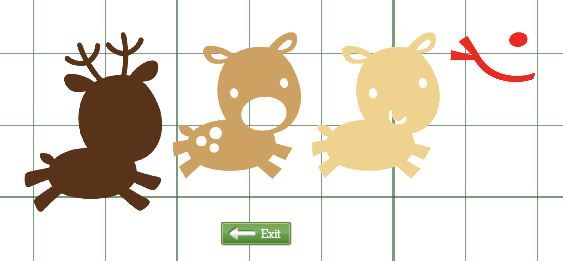
    The layers will be separated.

    • Press the Exit button to return back to the main CCR screen.
    I have found that once the layers are separated they seem to be slightly squashed together but they cut out just fine.


    The images are now ready for you to send to your Imagine to be printed and cut as individual objects.


    Be aware that each of the layers will have a light brown border around them as in the top row of images in the picture below.


    If you don't want the border to print...

    • Select the object on the mat and click the Ungroup button on the Toolbar.

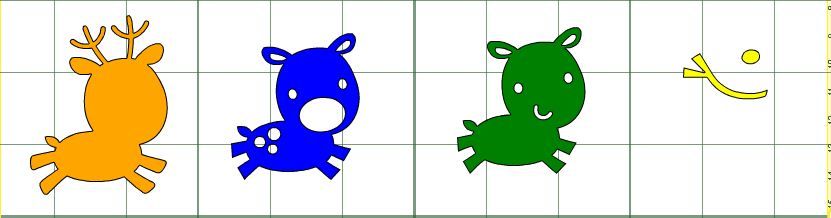
    When you cut them out they will look like the bottom row of images in the picture above. Notice that the mouth and some of the other feature lines didn't print.

    Something to keep in mind.... For a good result, make sure you calibration is spot on!!


    But "hang on" you say... "I don't have an Imagine!!!"

    The good news is once you've separated and ungrouped these images you can cut them on all the other Cricuts with just a few more steps.


    Because these are Imagine images CCR is looking for an Imagine when it goes to cut. When it sees that there's an E2 selected it doesn't cut. (Nothing happens when you click on the Cut button.)

    So you just need to trick it into thinking you have an Imagine....
    • From the Machine & Mat menu select the Cricut that you will actually be cutting from. This makes it easier if you are using the Personal, Create or Mini because you don't have to guess where to place your images.

    • Separate your layers as shown in the tutorial above and press the Exit button to return to the mat.
    •  Click anywhere on the group of images to select them then press the Ungroup button on the top toolbar.
    • Click anywhere on the mat to deselect the images. You can now move each separate piece around on the mat.
    If you're using just one CCR mat move your images around so that you can easily load your cutting mat with each of the different colour cardstock. 

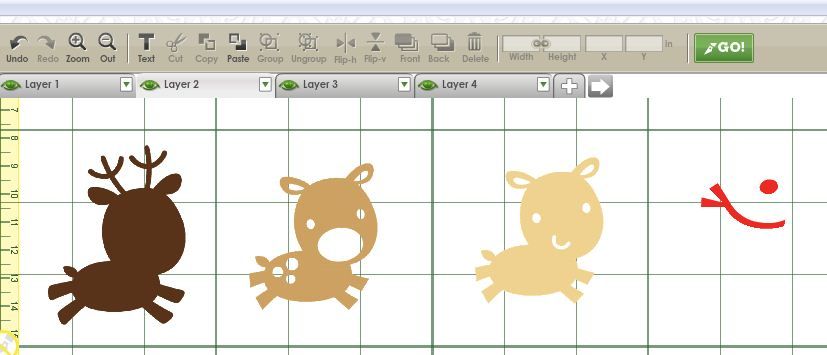
    If you want to cut multiples of each layer you might want to create multiple mats at this stage and cut and paste each layer to its own mat.  Then you can use the Autofill option to fill your mat or Image Quantity option to set how many of each shape you want. In the picture below you can see that I have used multiple mats as each layer is a different preview colour.


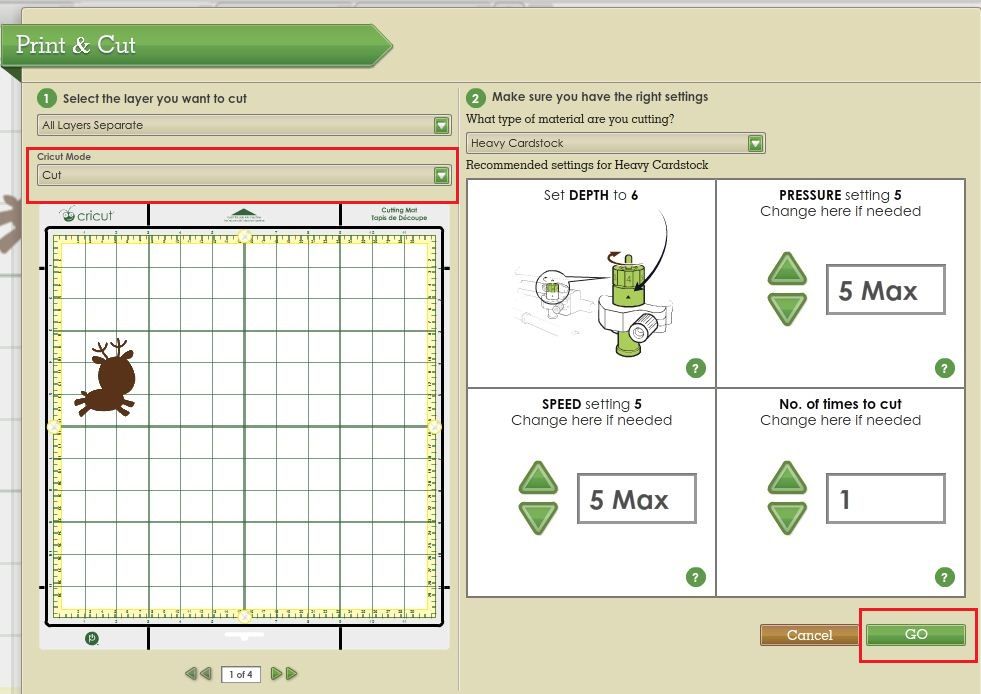
    • Go to the Machine & Mat menu and select the Imagine as the default machine. (It doesn't matter that you don't have one....)


    The images will change to the Imagine colours and the Cut button will change to a Go button.

    • Make sure your Cricut is powered on and connected to your computer. 
    •  Press the green Go button 

    Nothing will happen! (Other than the preview mat will change to the next mat if you have more than one. If that happened press the green arrow below the mat to go back to the first preview mat.)


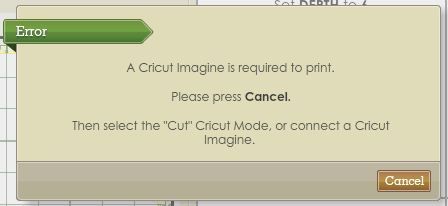
    • From the Cricut Mode menu select Cut. If you forget to select Cut from this menu you'll get this error. If that's the case, press Cancel and go back and change the Cricut Mode to Cut.

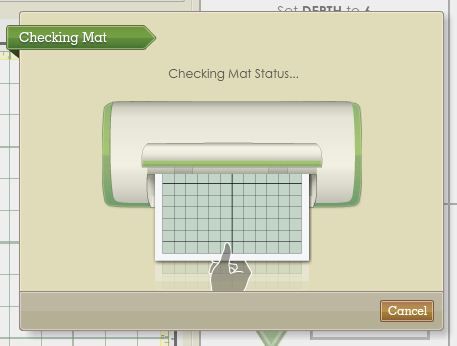
    • Then press the Go button 
    You'll see this message:


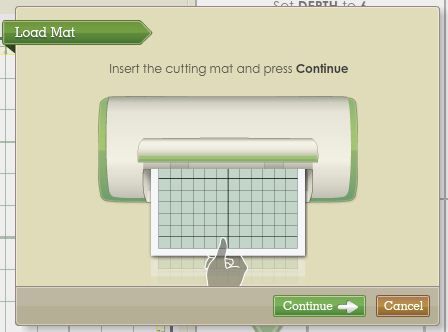
    If you haven't loaded your mat when you press the Go button you'll then see this message:


    • Load your mat and press Continue
    Then it should start to cut!


    • Continue pressing the Go button until all your layers are cut swapping out your mats if necessary.)

    I've tested this on my E2 and my Personal... and it works!!!

    Let me know how it works for you!!!


    Wednesday, January 2, 2013

    CCR and Windows 8

    There seems to be the misconception that CCR doesn't work with Windows 8.... (you'll be stuck on the Initializing screen if you have the problem...)


    While it's true that PC haven't released an update for Windows 8, you can still use it on a computer that has that operating system.

    And it's very simple...

    First make sure you have added CCRBridge.exe and Cricut-Craft Room.exe as exceptions to your anti-virus program as many of these programs are known to block CCR. Then....
    • Right click on the CCR icon on your desktop, and select Properties


    • Click the Compatibility tab
    • Click the Check box next to "Run the program in compatibility mode for" and Select Windows 7 from the drop down box. (If Windows 7 isn't an option, select the next most recent operating system - eg. Vista
    • From the "Privilege Level" section click on the check box next to "Run the program as an administrator"


    • Press Apply then OK to close the Properties box.
    Now try opening CCR again. If you still have the same problem repeat the same process, this time selecting a different operating system. Most users have success with Windows 7 but other have had to use Vista or XP.

    Good luck!


    Wednesday, October 31, 2012

    CCR Build 179

    Build 179 of CCR was released on October 18. Here are the release notes as posted by PCGena on the Cricut messageboard. (Thanks Gena) :

    • Firmware update for Cricut Create® machine allowing standalone use and compatibility with the Cricut Craft Room® design software
    • Firmware update for Cricut® Personal Cutter enabling cartridge linking
    • Improved Cricut Expression® 2 cartridge detection reliability
    • New project layers now add in front of existing layers
    • Minor bug fixes and improvements


    Great news that the Personal cutter can now link cartridges and that they have fixed the firmware problem with the Create! (Although I haven't tested either...)

    Not mentioned above is that there has been an improvement (for some users) of the printing and cutting function for the Imagine!!!! Whilst it doesn't work for me every time, I can at least get it to print and cut most of the time.

    What's not there??? The elusive Gypsy linking facility.... sad face....


    I'm so looking forward to the day I can post "It's here!!!!"


    Friday, August 17, 2012

    CCR Build 167

    CCR Build 167 was released earlier today. Here's a very quick overview of some of the changes. I'll do a more indepth post soon!

    The bad news.... Build 167 still doesn't allow the Imagine to cut.

    Click the image to enlarge it. :)